Using OAuth
(Created page with "### Tutorial To use OAuth in a DreamFactory Instance, you need to provision an OAuth service in your instance. You can provision an OAuth service from the 'Services' tab in A...") |
|||
| Line 10: | Line 10: | ||
On the config form you will need to provide all the details of your OAuth provider and select a default role for your | On the config form you will need to provide all the details of your OAuth provider and select a default role for your | ||
| − | OAuth service. This role will be assigned (for all applications in the system) to all users signing in | + | OAuth service. This role will be assigned (for all applications in the system) to all users signing in using this OAuth service. |
You will also need to provide a Redirect URL here. Your Redirect URL should be the URL of your app that the OAuth service | You will also need to provide a Redirect URL here. Your Redirect URL should be the URL of your app that the OAuth service | ||
provider (Facebook in this case) can use to reach back to your app with the Authorization Code. One important thing about | provider (Facebook in this case) can use to reach back to your app with the Authorization Code. One important thing about | ||
| Line 16: | Line 16: | ||
part of URL query string (?service=facebook). This is important because this is the only identifier of your service in your | part of URL query string (?service=facebook). This is important because this is the only identifier of your service in your | ||
DreamFactory instance. This is how your app will know which service to use for handling callback when Facebook calls back | DreamFactory instance. This is how your app will know which service to use for handling callback when Facebook calls back | ||
| − | your application using this redirect URL. | + | your application using this redirect URL. Once the service is successfully provisioned it is ready for authenticating your users. |
[[File:Oauth tutorial 2.png|800px]] | [[File:Oauth tutorial 2.png|800px]] | ||
| − | |||
### API Endpoints | ### API Endpoints | ||
| Line 58: | Line 57: | ||
* Use the 'URL' in response to redirect to Facebook's login page. | * Use the 'URL' in response to redirect to Facebook's login page. | ||
* After successful login Facebook redirects back to your app with authorization code and service name on URL query string. | * After successful login Facebook redirects back to your app with authorization code and service name on URL query string. | ||
| − | * Extract the entire URL query string from Facebook's callback URL and make following request to | + | * Extract the entire URL query string from Facebook's callback URL and make following request to sign into your DreamFactory Instance. |
* Request URL <pre>POST https://your-url/api/v2/user/session?oauth_callback=true&{extracted_query_string_from_callback}</pre> | * Request URL <pre>POST https://your-url/api/v2/user/session?oauth_callback=true&{extracted_query_string_from_callback}</pre> | ||
* Response: | * Response: | ||
Revision as of 20:28, 21 September 2015
- Tutorial
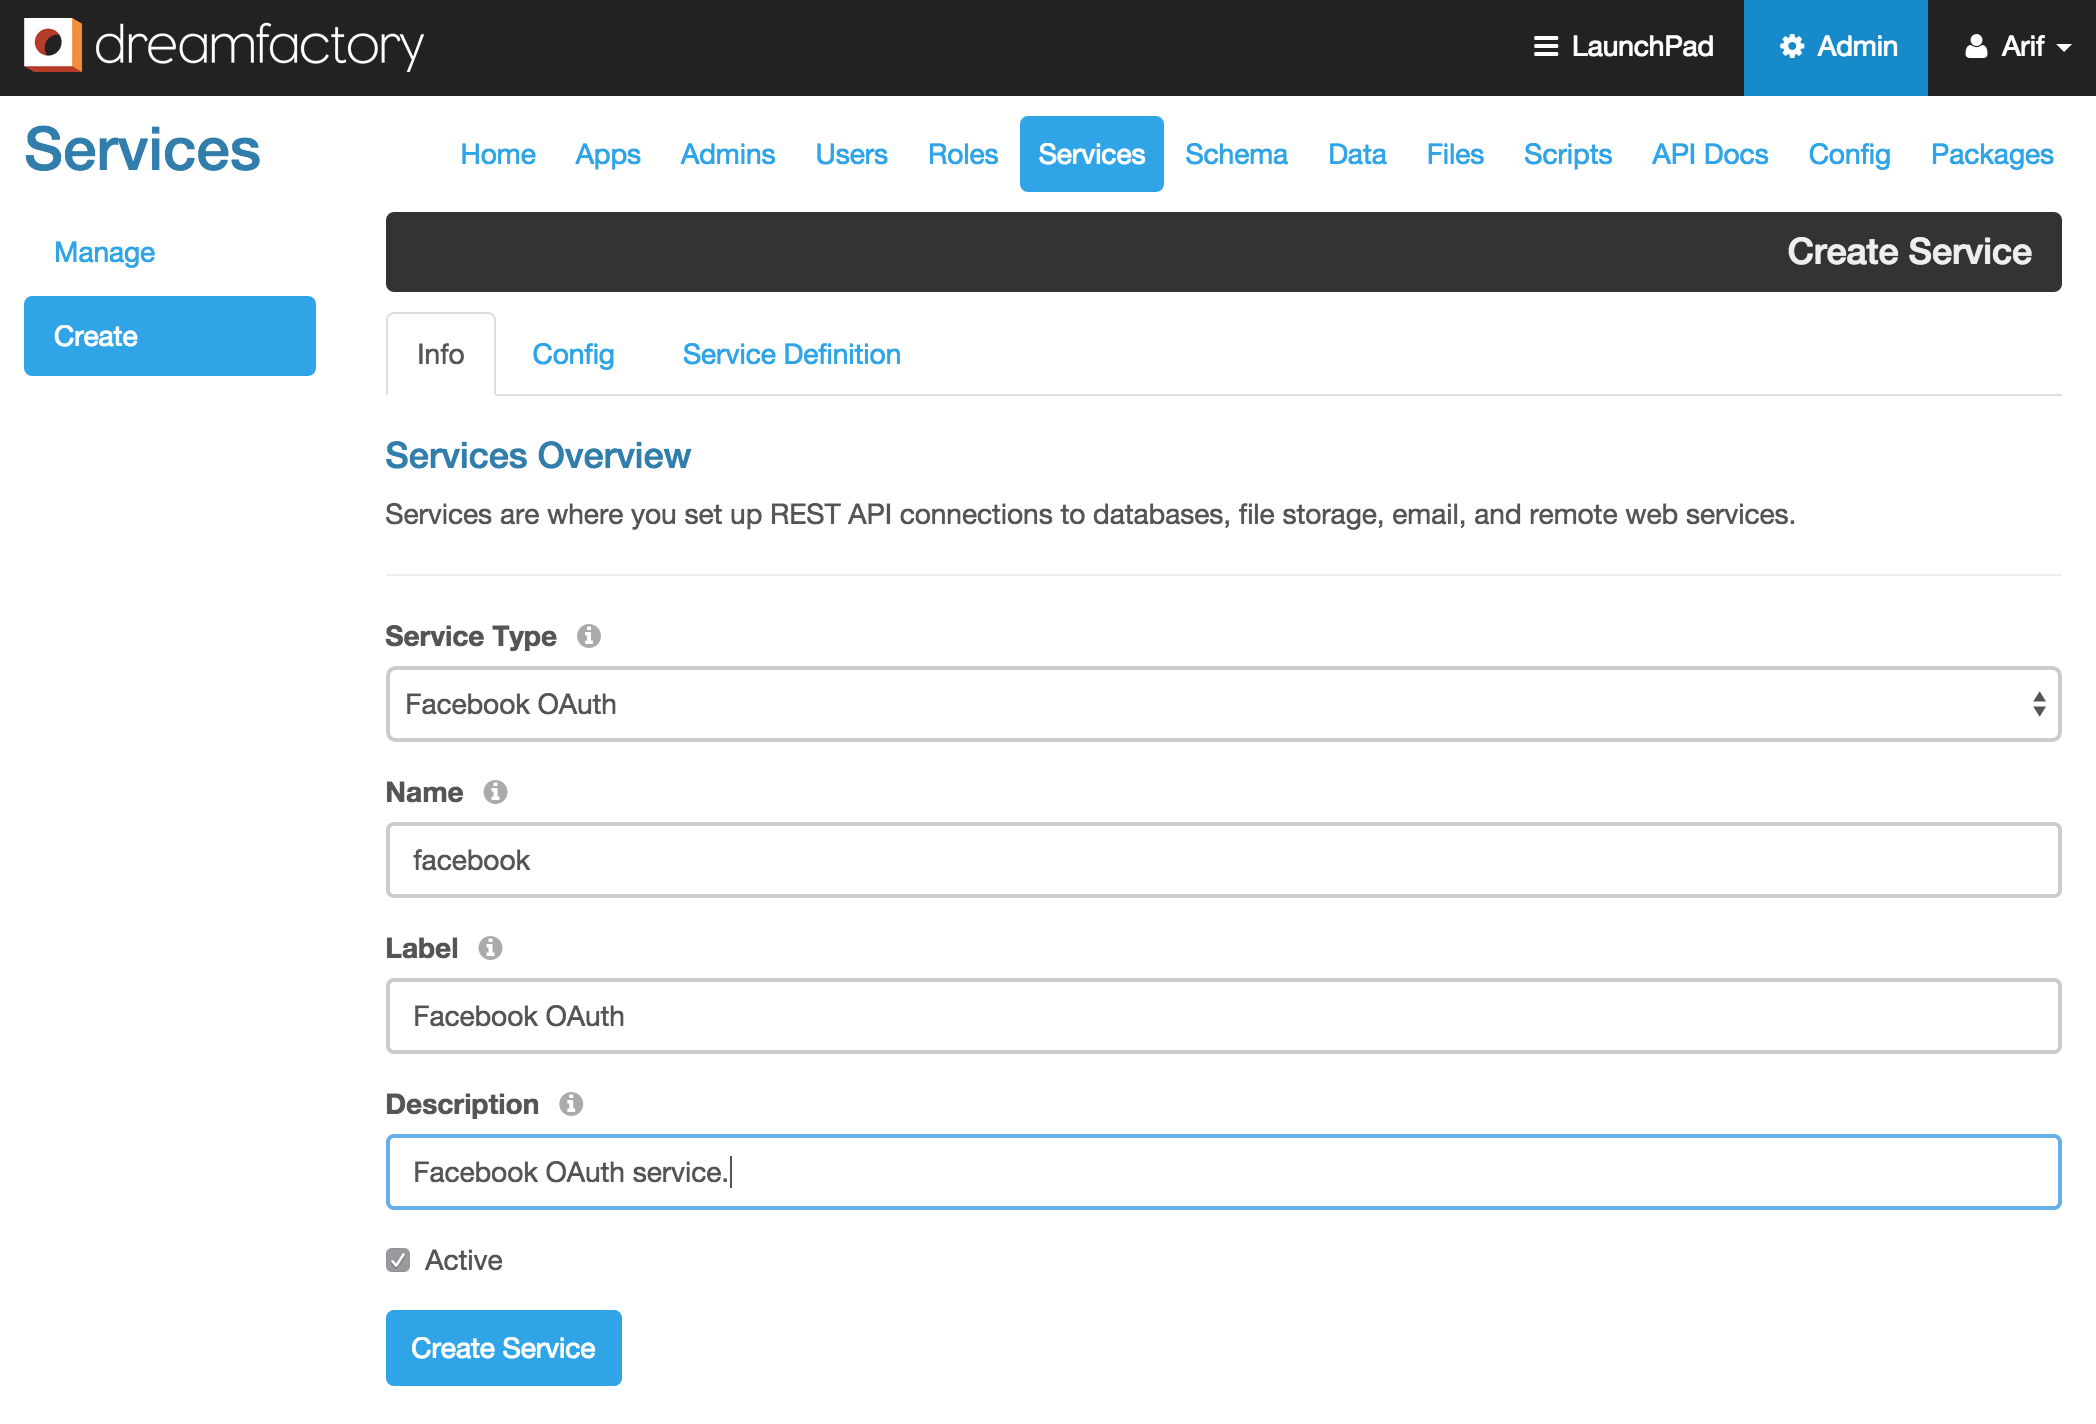
To use OAuth in a DreamFactory Instance, you need to provision an OAuth service in your instance. You can provision an OAuth service from the 'Services' tab in Admin Console. Click on the 'Create' button on the services tab to create a new service. Select an OAuth service provider (Facebook OAuth in this case) under the OAuth services from the 'Service Type' drop down menu. For the name field use a short, meaningful, one word name for your service. This will be use as your OAuth service identifier. Fill out rest of the information on this form and then go to 'Config' tab.
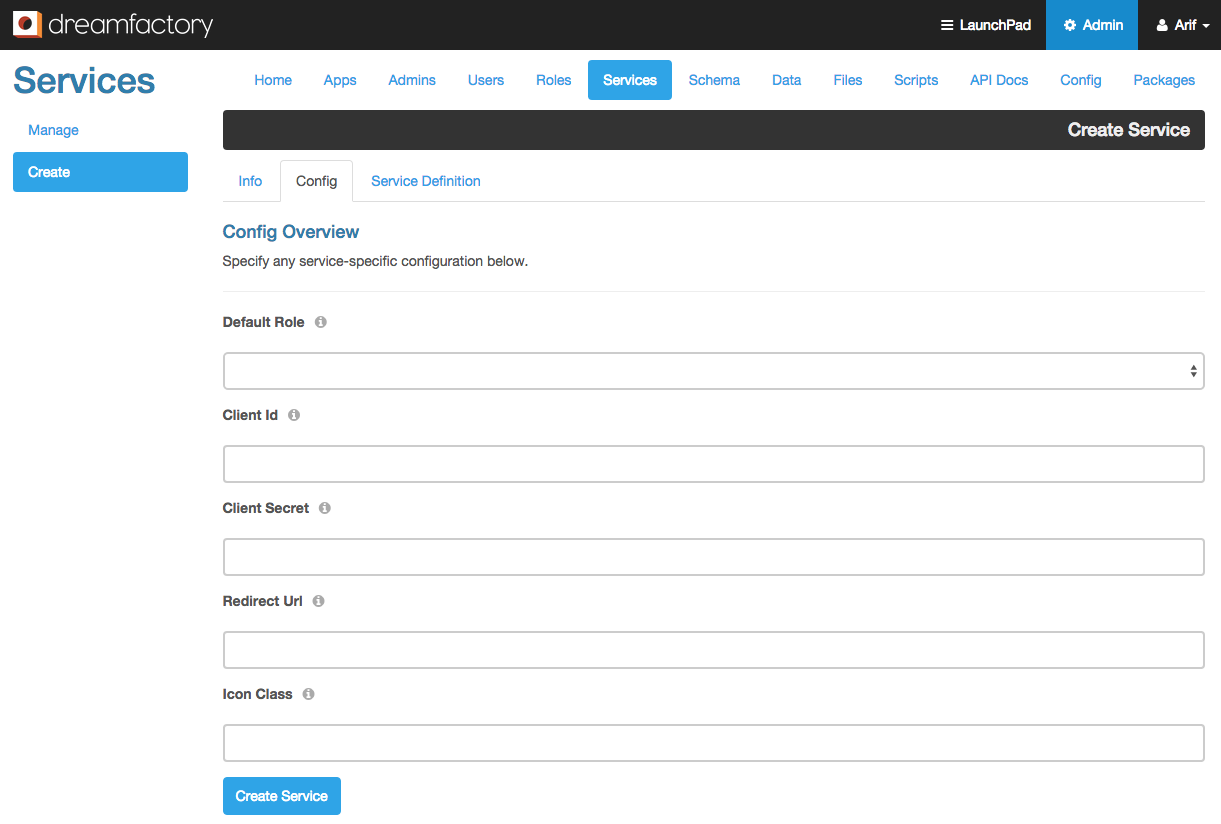
On the config form you will need to provide all the details of your OAuth provider and select a default role for your OAuth service. This role will be assigned (for all applications in the system) to all users signing in using this OAuth service. You will also need to provide a Redirect URL here. Your Redirect URL should be the URL of your app that the OAuth service provider (Facebook in this case) can use to reach back to your app with the Authorization Code. One important thing about the Redirect URL is that you will need to include your service name in it. In this case,I am including the service name as part of URL query string (?service=facebook). This is important because this is the only identifier of your service in your DreamFactory instance. This is how your app will know which service to use for handling callback when Facebook calls back your application using this redirect URL. Once the service is successfully provisioned it is ready for authenticating your users.
- API Endpoints
- Redirecting to OAuth provider's site for signing in.
POST https://your-url/api/v2/user/session?service={oauth_service_name}
-- OR --
POST https://your-url/api/v2/user/session
{
    "service" : "oauth_service_name"
}
- Signing into your DreamFactory Instance
POST https://your-url/api/v2/user/session?oauth_callback=true&{query_string_from_callback_containing_authorization_code_and_service_name}
- Example - Sign-in using Facebook
- Service name: facebook
- Request URL
POST https://your-url/api/v2/user/session?service=facebook
- Response:
{
	"response": {
		"redirect": true,
		"url": "https://www.facebook.com/v2.4/dialog/oauth?client_id=123&redirect_uri=foo&scope=email&response_type=code"
	}
}
- Use the 'URL' in response to redirect to Facebook's login page.
- After successful login Facebook redirects back to your app with authorization code and service name on URL query string.
- Extract the entire URL query string from Facebook's callback URL and make following request to sign into your DreamFactory Instance.
- Request URL
POST https://your-url/api/v2/user/session?oauth_callback=true&{extracted_query_string_from_callback} - Response:
{
    "session_token": “abc.123abc.efg”,
    "session_id": “abc.123abc.efg”,
    "id": 1,
    "name": "John",
    "first_name": "John",
    "last_name": "Doe",
    "email": "jdoe@gmail.com",
    "is_sys_admin": false,
    "last_login_date": "2015-06-30 16:46:59",
    "host": "your-url"
}

