API Limits
Contents
DreamFactory API Rate Limiting
DreamFactory limits can be set for a specific user, role, service, or endpoint. Additionally, you can set limits for each user, where every user will get a separate counter. Limits can be created to only interact with a specific HTTP verb, such as a ‘GET’ or you could create another limit for a `POST` to a specific service. Endpoint limits also provide yet another powerful way to restrict at a granular level within your DreamFactory instance.
Limits Hierarchy
Limits can be created to cover an entire instance or provide coverage down to a specific endpoint. When limits are combined, a type of limits hierarchy is created where the broader limits can sometimes override the more granular ones. Take for example a limit created for the entire instance with 500 hits per minute. If a limit is created for a specific service for 1,000 hits per minute, the instance limit would issue a 429 HTTP (over limit) error at 500 hits within a minute, so the service limit would never ever reach 1,000. Make sure to keep the big picture in mind when creating multiple limits and planning your limits strategy. Set the more broad-based limit types at an appropriate level to the more granular ones.
Limit Types
Each API limit is based on a specific period of time when the limit expires and resets. Options here are configurable and include minute, hour, day, 7-day (week), and 30-day (month). The variety of limit types in combination with limit periods allows for a wide range of control over your instance. The following table provides an overview of the different types of limits available.
| Limit Type | Description |
|---|---|
| Instance | Controls rate limiting over the entire instance to include all services, roles, and users. Limit counter here is cumulative, regardless of user, service, etc. |
| User | Provides rate limit control to a specified user. In the case where both a User limit and an Each User limit is set, the user-specific limit will override Each User in terms of rate. However, both counters will still increment. |
| Each User | Sets a rate limit for each user. The main difference between this and the entire instance is that every user gets a separate counter. |
| Role | Enable rate limiting by a specified role. |
| Service | Enable rate limiting by a specified service. |
| Service by User | Enable rate limiting for a specific user on a specific service. |
| Service by Each User | Enable rate limiting for each user on a specific service. |
| Endpoint | Enable rate limiting by a specified endpoint. |
| Endpoint by User | Enable rate limiting for a specific user on a specific endpoint. |
| Endpoint by Each User | Enable rate limiting for each user on a specific endpoint. |
Limit Periods
Limit periods include minute, hour, day, 7-day (week), and 30-day (month). The limit period determines how long the limit remains in effect until automatically resetting after the period has expired.
Limits via API
Like all other services in DreamFactory, limits can be managed via the API alone, provided that the user has the appropriate permissions to the system/ resource. Limits can be managed from the following endpoints:
- api/v2/system/limit - Endpoints to manage CRUD operations for limits.
- api/v2/system/limit_cache - Endpoints to check current limit volume levels and reset limit counters manually.
Creating Limits
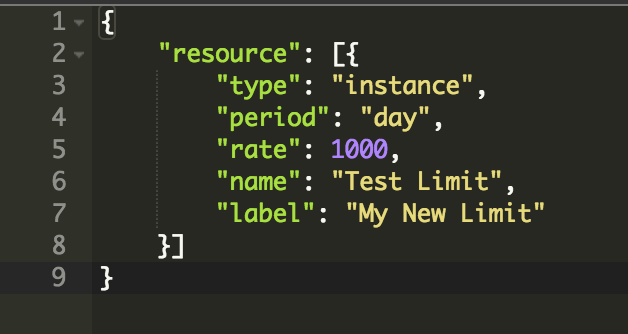
Limits are created by sending a POST to /api/v2/system/limit. To create a simple instance limit, POST the following resource to the endpoint:
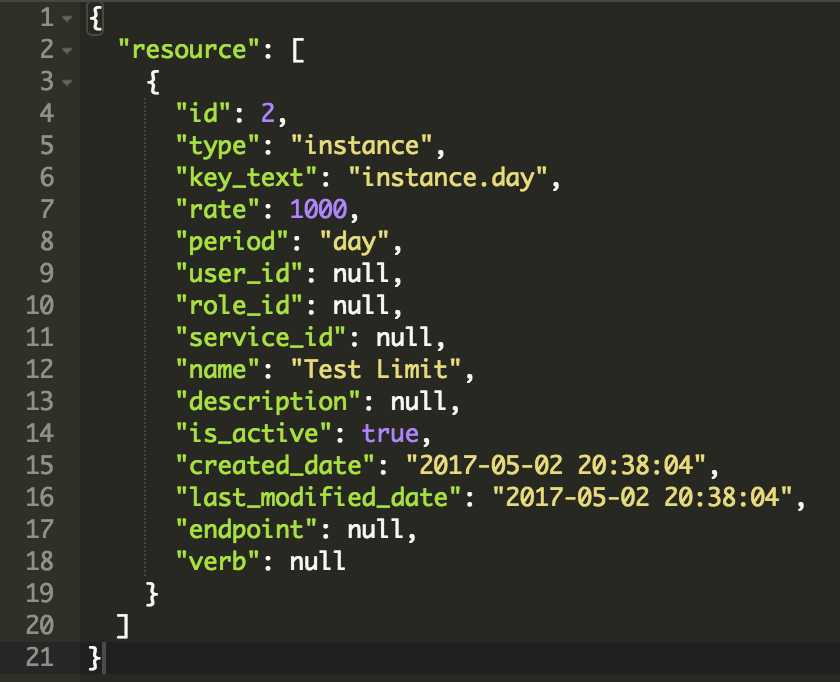
These are the minimum required parameters to create a limit. If you pass a ?fields=* with your post, you will receive back all possible fields for the endpoint in addition to the id of the created limit as well as the timestamps when it was created.
Not passing the fields=* will result in just a resource id for each limit created. To create multiple limits in a batch mode, you can pass multiple limit objects in the resource array.
As you can see, there are a lot of potential parameters you are able to pass. The following table will help with what is required for each limit type.
| Limit Type | API “type” Parameter | Additional Required Params* |
|---|---|---|
| Instance | instance | N/A |
| User | instance.user | user_id |
| Each User | instance.each_user | N/A |
| Service | instance.service | service_id |
| Service By User | instance.user.service | user_id, service_id |
| Service by Each User | instance.each_user.service | service_id |
| Endpoint | instance.service.endpoint | service_id, endpoint |
| Endpoint by User | instance.user.service.endpoint | user_id, service_id, endpoint |
| Endpoint by Each User | instance.each_user.service.endpoint | service_id, endpoint |
| Role | instance.role | role_id |
*Standard required parameters include: type, rate, period, and name.
Below is a table which describes all of the available parameters that can be passed when creating limits.
| Parameter | Type | Required | Description |
|---|---|---|---|
| type | {string} | Yes | The type of instance you are creating. See table above for a detailed description. |
| key_text | {string} | N/A | Informational only field. This key is built automatically by the system and is a unique identifier for the limit. |
| rate | {Integer} | Yes | Number of allowed hits during the limit period. |
| period | {enum} | Yes | Period where limit automatically resets. Valid values are:
'minute', 'hour', 'day', '7-day', '30-day', |
| user_id | {integer} | (see above table) | Id of the user for user type limits. |
| role_id | {integer} | (see above table) | Id of the role for role type limits. |
| service_id | {integer} | (see above table) | Id of the service for service and endpoint type limits. |
| name | {string} | Yes | Arbitrary name of the limit (required). |
| description | {string} | No | Limit description (optional). |
| is_active | {bool} | No | Defaults to true. Additionally, you can create a limit that is in an “inactive” state which can be activated later (optional). |
| create_date | {timestamp} | N/A | Informational only. |
| last_modified_date | {timestamp} | N/A | Informational only. |
| endpoint | {string} | (see above table) | Endpoint string (see table above when required). Additionally, reference the section on Endpoint Limits for additional information. |
| verb | {enum} | No | Defaults to all verbs. Passing an individual verb will only set the limit for those requests. Can be specified with any limit type. Valid values are:
'GET', 'POST', 'PUT', 'PATCH', 'DELETE' |
User vs. Each User Limits
You can assign a limit to a specific user for the entire instance, a particular service, or a specific endpoint. This type of limit will only affect a single user, not the entire instance, service, or endpoint. Each User type limits can also be created for these as well, the main difference being that in an Each User limit, every user will get a separate counter. For example, if you set a limit on a particular service and set the rate at 1,000 hits per day, a single user can reach the limit and it would affect any subsequent requests coming in to that service, regardless of user. In an Each User Service type limit, every user will get a separate counter to reach the 1,000 per day. This also works the same with the other limit types.
NOTE: There is no way to clear an individual user’s counter with Each User type limits, only a User limit.
Clearing the counter for an Each User limit type will reset all users.
Service Limits
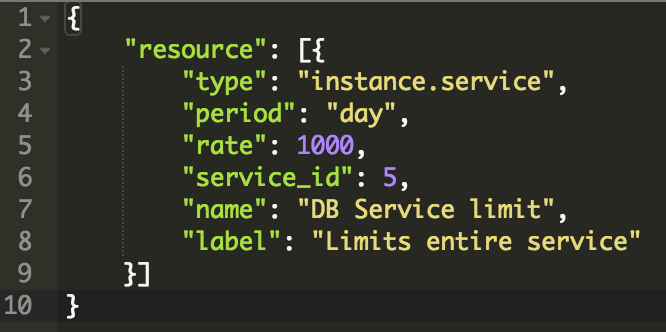
When you create a service limit, you are limiting based on a specific service. To create this type of limit, pass in the id of the service you want to create.
Role Limits
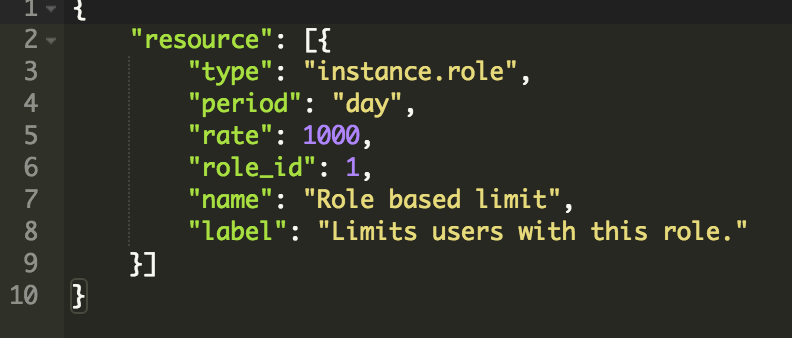
Role limits are much the same as the service limits, but combined with the security settings in Role, you can create some really powerful role-based limit combinations.
Endpoint Limits
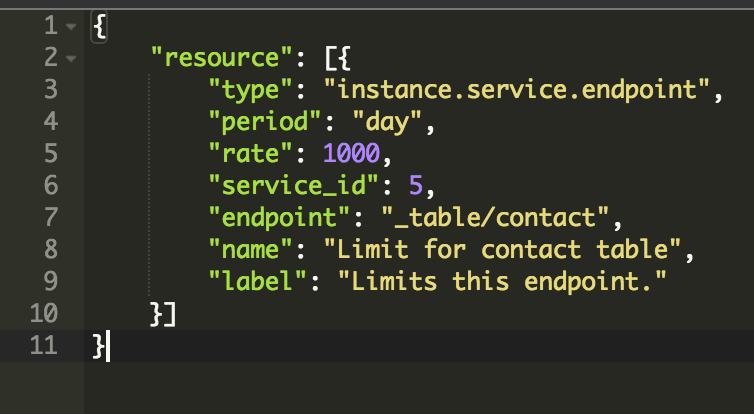
Endpoint limits allow an API administrator to get very granular on what type of requests can be singled out for limiting. Basically anything available in the API Docs tab of the Admin Application can be used as an endpoint limit. Endpoint limits can, and in some cases should be combined with a specific verb. Since all of the endpoints within DreamFactory are tied into services, a service_id is required when creating endpoint limits. So, if you are targeting “/db/_table/contact”, you will need to select the db service by id and the supply the rest of the endpoint as a string. Example:
Creating the type of limit as shown in the example above would only hit if the specific resource of the request coming in matches exactly the stored limit. Therefore, only “_table/contact” would increment the limit counter, not “_table/contact/5” or further variations on the endpoint’s parameters.
Wildcard Endpoints
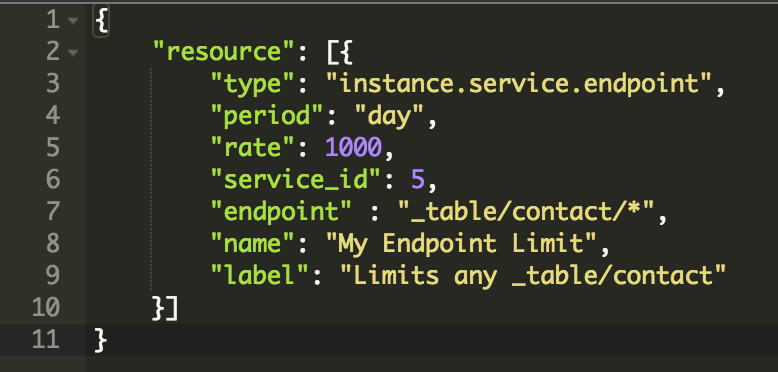
Because there may be a situation where you want to limit an endpoint and all variations on the endpoint as well, we have built in the ability to add wildcards to your endpoint limits. So, by adding a wildcard “*” character to your endpoint, you are creating an endpoint limit that will hit with the specific endpoint as well as any additional parameters. Screen Shot 2017-05-08 at 2.17.08 PM.png Every endpoint limit is associated with a service. Therefore, endpoint limits are simply an extension of a service type limit. A service limit will provide limit coverage to every endpoint under the service, whereas the endpoint limit is more targeted. Combined with wildcards and specific verbs, endpoint limits become very powerful.
Limit Cache
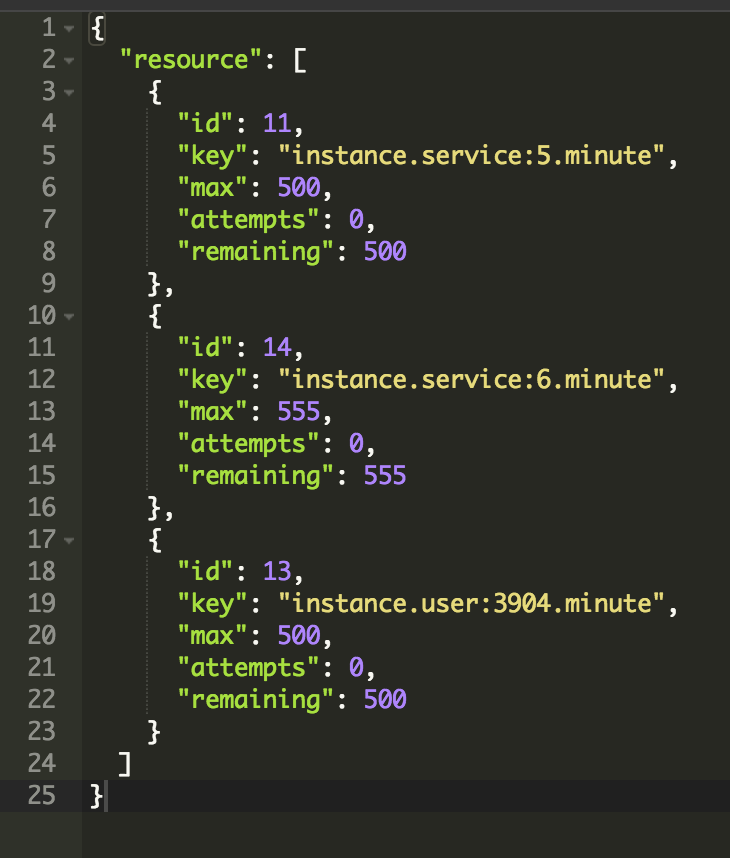
By default, Limits use a file-based cache storage system. Garbage collection is automatic and is based on the limit period. You can poll the limit cache system via API in order to get the current hit count for each limit. The GET call to system/limit_cache will provide the Id of the limit, a unique key, the max number of attempts and the current attempt count, as well as remaining attempts in the limit period.
Clearing Limit Cache
Clearing the limit cache involves resetting the counter for a specific limit. Additionally, all limit counters can be reset at once by passing a “allow_delete=true” parameter to the system/limit_cache endpoint. Passing the Id of a specific limit to the system/limit_cache endpoint, such as system/limit_cache/11 will only clear the limit counter for that particular limit.
Limit Cache Storage Options
By default, the limit cache uses file-based caching. This file cache is separate from the DreamFactory (main) cache so that when cache is cleared in DreamFactory, limit counts are not affected. Redis can also be used with the limit cache. Please see the .env-dist file for limit cache options.
