---
title: "RaspberryPi2 - DreamFactory"
source: "http://wiki.dreamfactory.com/DreamFactory/Installation/RaspberryPi2"
canonical_url: "http://wiki.dreamfactory.com/DreamFactory/Installation/RaspberryPi2"
converted_at: "2026-01-22T02:19:53.448Z"
format: "markdown"
converted_by: "html-to-md-ai"
---
[]()
# RaspberryPi2
From DreamFactory
Jump to: [navigation](#mw-head), [search](#p-search)
[DreamFactory](/DreamFactory)[Installation](/DreamFactory/Installation)RaspberryPi2**DreamFactory can be installed and configured on Raspberry Pi 2 as an open source IoT gateway.**
Since DreamFactory relies on PHP and Laravel frameworks, the existing Raspbian distribution needs to be upgraded from Wheezy to Jessie. The upgrade process involves some manual work, including updating the package sources for Jessie and building PHP 5.6 from the sources. [Ubuntu Mate](https://ubuntu-mate.org/) is a stable, easy-to-use Debian distribution that can run on Raspberry Pi 2. Since it comes with PHP 5.6, it is easy to install all the required dependencies through simple apt-get install commands.
**Here's a step-by-step guide to install DreamFactory on Raspberry Pi 2.**
## Contents
- [1 Install Ubuntu Mate on Raspberry Pi 2](#Install_Ubuntu_Mate_on_Raspberry_Pi_2)
- [2 Install Apache, MySQL, and PHP](#Install_Apache.2C_MySQL.2C_and_PHP)
- [3 Install phpMyAdmin](#Install_phpMyAdmin)
- [4 Set Up the DreamFactory Database in MySQL](#Set_Up_the_DreamFactory_Database_in_MySQL)
- [5 Install Composer](#Install_Composer)
- [6 Configure Apache 2 to Run DreamFactory](#Configure_Apache_2_to_Run_DreamFactory)
## Install Ubuntu Mate on Raspberry Pi 2
Follow the same procedure as setting up Raspbian for installing Ubuntu Mate on Raspberry Pi 2. Download the [image](https://ubuntu-mate.org/raspberry-pi/), uncompress it, and write it to a SD card. You can take the help of [Pi Filler](http://ivanx.com/raspberrypi/) to burn the .img file to the SD card. Boot Raspberry Pi with the SD card and follow the on-screen instructions. Make sure that the operating system is successfully installed.
[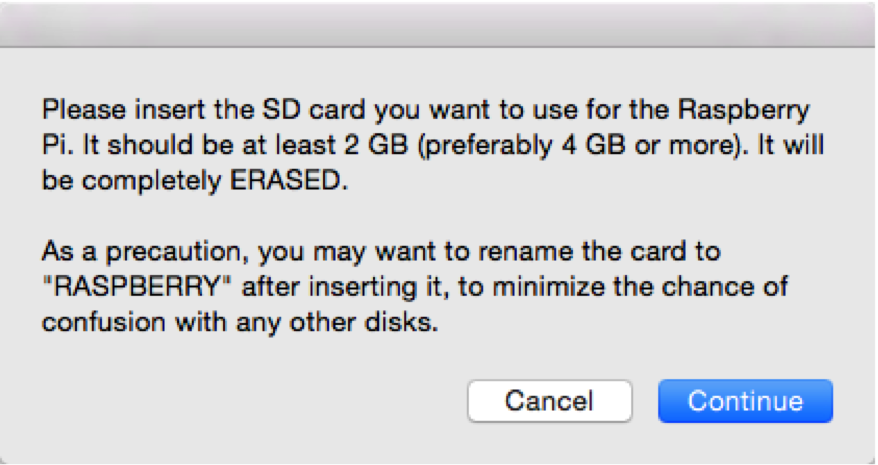](/File:Pi-filler.png)
*Pi Filler prompting to insert the SD card*
[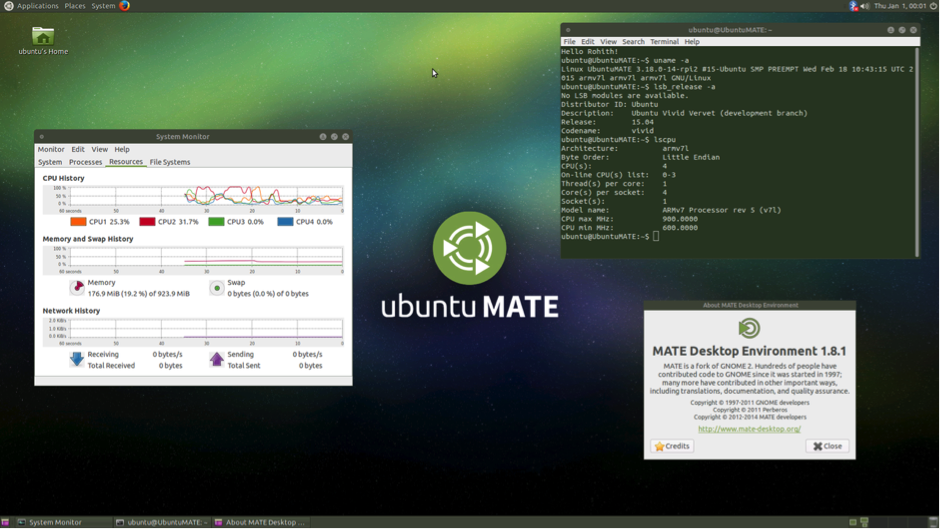](/File:Ubuntu-mate.png)
*Ubuntu Mate Desktop on Raspberry Pi 2*
## Install Apache, MySQL, and PHP
- **Open the terminal window and run the following commands**:
$ sudo apt-get install –y curl apache2 php5 php5-common php5-cli php5-curl php5-json
mcrypt php5-mcrypt php5-gd php5-mysqlnd mysql-server mysql-client git
You may be prompted to enter the password for MySQL root user.
- **Once that's done, open Firefox in Ubuntu Mate Desktop and visit [http://localhost](http://localhost) to confirm the installation of Apache. You should see the default Apache2 Ubuntu page.**
## Install phpMyAdmin
**Note**:phpMyAdmin will be a handy tool that we can use later. Installing it will confirm that the LAMP stack is properly configured. You can setup phpMyAdmin with just one command:
$ sudo apt-get install phpmyadmin
## Set Up the DreamFactory Database in MySQL
**Note**:DreamFactory expects a database to be in place during the installation. Run the following commands to set up the database in MySQL:
$ mysql -u root –p
- **Within the MySQL environment, run the following SQL commands**:
mysql> create database dreamfactory;
mysql> grant all privileges on dreamfactory.* to df_admin'@'localhost' identified by df_admin';
mysql> quit
- **Clone DreamFactory repo**
With all the prerequisites in place, you're now ready to set up DreamFactory. Run the below commands to clone the GitHub repo.
$ cd /opt
$ git clone [https://github.com/dreamfactorysoftware/dreamfactory.git](https://github.com/dreamfactorysoftware/dreamfactory.git)
$ cd dreamfactory
$ cp .env-dist .env
We need to point the DreamFactory environment variables to the MySQL database. To do this, we copied the .env-dist file .env. If you created a user with a different name than df_admin, you need to update the database settings section of the .env file. Otherwise, you need not make any changes to the file.
**The directory needs appropriate permissions to function properly. Run the following commands to configure them**:
$ sudo chown -R www-data:www-data /opt/dreamfactory/
$ sudo chmod -R 777 /opt/dreamfactory/storage/
$ sudo chmod -R 777 /opt/dreamfactory/bootstrap/cache
## Install Composer
DreamFactory uses Composer to manage dependencies. Let’s go ahead and install it.
$ cd /opt/dreamfactory
$ sudo curl -sS [https://getcomposer.org/installer%7C](https://getcomposer.org/installer%7C) php
$ sudo mv composer.phar /usr/local/bin/composer
With Composer in place, it’s time for us to run the update tool.
$ cd /opt/dreamfactory
$ sudo composer update
This will take about 10 minutes to download and configure all the dependencies required by DreamFactory. Before moving to the next step, make sure that Composer is not reporting any errors.
## Configure Apache 2 to Run DreamFactory
There are only a few more steps before we can launch DreamFactory. We need to register the site with Apache, update the ServerName variable, and finalize the configuration.
$ sudo cp /opt/dreamfactory/server/config/apache/etc/apache2/sites-available/dsp.local.conf /etc/apache2/sites-available/dreamfactory.conf
- **Edit the dreamfactory.conf file and update the ServerName with the local IP address of Raspberry Pi 2. Replace the DocumentRoot and Directory entries with the actual location of DreamFactory - /opt/dreamfactory/public. Your configuration file should look like this**:
```
ServerAdmin webmaster@localhost
ServerName
DocumentRoot "/opt/dreamfactory/public"
Options -Indexes +FollowSymLinks -MultiViews
AllowOverride All
Require all granted
ErrorLog ${APACHE_LOG_DIR}/dsp.error.log
# Possible values include: debug, info, notice, warn, error, crit,
# alert, emerg.
LogLevel info
CustomLog ${APACHE_LOG_DIR}/dsp.access.log combined
```
- **Run the commands below to finalize the installation process. The final step is to restart Apache.**
$ sudo a2ensite
$ sudo a2enmod rewrite
$ sudo php5enmod mcrypt
$ sudo service apache2 restart
Test the DreamFactory installation by typing the IP address of Raspberry Pi 2.0. After a brief wait of a few seconds, which is required for the first run of DreamFactory, you should see the sign up screen.
Retrieved from "[https://wiki.dreamfactory.com/index.php?title=DreamFactory/Installation/RaspberryPi2&oldid=32670](https://wiki.dreamfactory.com/index.php?title=DreamFactory/Installation/RaspberryPi2&oldid=32670)"